Kubernetes has become the de-facto standard for container orchestration, providing powerful capabilities for deploying and managing stateless workloads. However, users running stateful applications on Kubernetes face unique challenges, especially in VMware environments. A key issue is that the virtual disks used by stateful apps can’t be attached to pods as easily as ephemeral storage. The volumes need to persist even when pods fail and restart. Overall, IT teams need to carefully evaluate challenges and constraints before running stateful workloads on Kubernetes clusters on VMware.
Users who run containerized workloads on Kubernetes clusters on their vSphere environment use Amazon EKS Anywhere (EKS Anywhere). EKS Anywhere on vSphere does not include a default Container Storage Interface (CSI) driver. However, VMware offers a CSI driver with the vSphere Container Storage Plug-in for managing stateful workloads. The vSphere Container Storage Plug-in is a volume plug-in that runs in a native Kubernetes cluster deployed in vSphere and is responsible for provisioning persistent volumes on vSphere storage. An advantage of using this plug-in is snapshot capabilities, which is important for backup and disaster recovery (DR) scenarios.
GitOps manages application and infrastructure deployment so that the system is described declaratively in a Git repository. It is an operational model that allows you to manage the state of multiple Kubernetes clusters by using the best practices of version control, immutable artifacts, and automation. Flux is a GitOps tool that can be used to automate the deployment of applications on Kubernetes as well as manage EKS Anywhere clusters. It works by continuously monitoring the state of a Git repository and applying changes to a cluster.
In this post we demonstrate the process of using GitOps to deploy and manage stateful workloads on your EKS Anywhere cluster on your vSphere environment with vSphere CSI driver.

In this setup, we start with creating vCenter configuration secrets, which are necessary to create storage with vCenter. Then, we install External Secrets Operator to query access keys from AWS Secrets Manager, which are necessary for setting up the vSphere CSI Driver. For this demonstration, we are using Secrets Manager to illustrate the approach, and users can also use any other vault implementation. Next, we configure GitOps through Flux to deploy the vSphere CSI driver manifests from a git repository. Finally, we deploy a stateful workload to validate the backup and restore capabilities of persistent volumes on vCenter storage through our vSphere CSI driver. The outline of this is shown in the preceding diagram.
Prerequisites
Make sure the following prerequisites are complete:
- A Linux-based host machine using an Amazon Elastic Compute Cloud (Amazon EC2) instance, an AWS Cloud9 instance, or a local machine with access to your AWS account.
- Configure admin access to the EKS Anywhere cluster from the host machine.
- Configure IAM Roles for Service Account (IRSA) on the EKS Anywhere cluster.
- Install the following tools on the host machine from the previous two steps:
- AWS Command Line Interface (AWS CLI) version 2 to interact with AWS services using CLI commands.
- Helm to deploy and manage Kubernetes applications.
- kubectl to communicate with the Kubernetes API server.
- eksctl and eksctl anywhere to create and manage the EKS Anywhere cluster.
- Git to clone the necessary source repository from GitHub.
- curl to make HTTP requests.
- envsubst to substitute environment variables in shell.
- Flux for creating the Git repository source.
Create the vCenter configuration secrets
The first step in our setup process is to create the necessary vCenter configuration secrets. Let’s export a few vCenter details to the environment variable
Next, let’s set up the configuration secrets that are loaded from Secrets Manager:
Next, let’s load the configuration secrets to Secrets Manager:
Installing external secrets operator
The next step in our setup process is to setup external secrets to securely access the vCenter Cloud Controller Manager and CSI Driver configuration secrets from Secrets Manager. First, let’s start with creating an AWS Identity and Access Management (IAM) policy and role to allow the cluster to access only the Secrets Manager secrets we created in the previous step:
Next, we deploy external-secrets through Helm to sync secrets between Secrets Manager and EKS Anywhere cluster.
Next, let’s verify if external-secrets has been successfully deployed and all pods are ready:
To use IRSA for our secrets retrieval we need a service account in each namespace using external-secrets to assume that role. Since one of the service accounts resides in the vmware-system-csi namespace, we also create that now:
Next, let’s create the ClusterSecretStore which is a scoped SecretStore that can be referenced by all ExternalSecrets from all namespaces
Verify the ClusterSecretStore status using the following command:
Configure GitOps with Flux to install Cloud Controller Manager and vSphere CSI Driver
Note that you can skip flux install step can be skipped if you are already using GitOps enabled EKS Anywhere cluster, the EKS Anywhere installation process installs Flux on your behalf.
We use GitOps sync through Flux to handle the deployment of the CSI driver into our EKS Anywhere cluster. Deploy Flux in your EKS Anywhere cluster using the following command
Verify that the CSI driver installation is successful
Check that the cloud controller manager and CSI driver were installed successfully and that the Storage class was created
Verify GitOps deployment of sample stateful workload along with backup and restore
Finally, we validate our GitOps setup, which deployed a sample stateful workload along with validating the backup and restore capabilities with our deployed vSphere CSI driver. This sample stateful workload has deployed a sample app, which created a volume and then created a snapshot.
For managing storage for stateful workloads, the vSphere CSI driver uses two API resources: PersistentVolume (PV) and PersistentVolumeClaim (PVC) of PersistentVolume subsystem. A PVC is a request for storage by a user. It is similar to a Pod. Pods consume node resources and PVCs consume PV resources. Pods can request specific levels of resources (CPU and memory). Claims can request specific size and access modes (such as they can be mounted ReadWriteOnce, ReadOnlyMany, ReadWriteMany, or ReadWriteOncePod, see AccessModes). A PV is a piece of storage in the cluster that has been provisioned by an administrator or dynamically provisioned using Storage Classes. It is a resource in the cluster just like a node is a cluster resource. PVs are volume plugins like volumes, but they have a lifecycle independent of any individual pod that uses the PV. This API object captures the details of the implementation of the storage, be that NFS, iSCSI, or a cloud-provider-specific storage system.
Run the following commands to see the pod of sample stateful workload along with the PVC, which is bound to our vmware-sc storage class and a PV dynamically provisioned with vCenter storage:
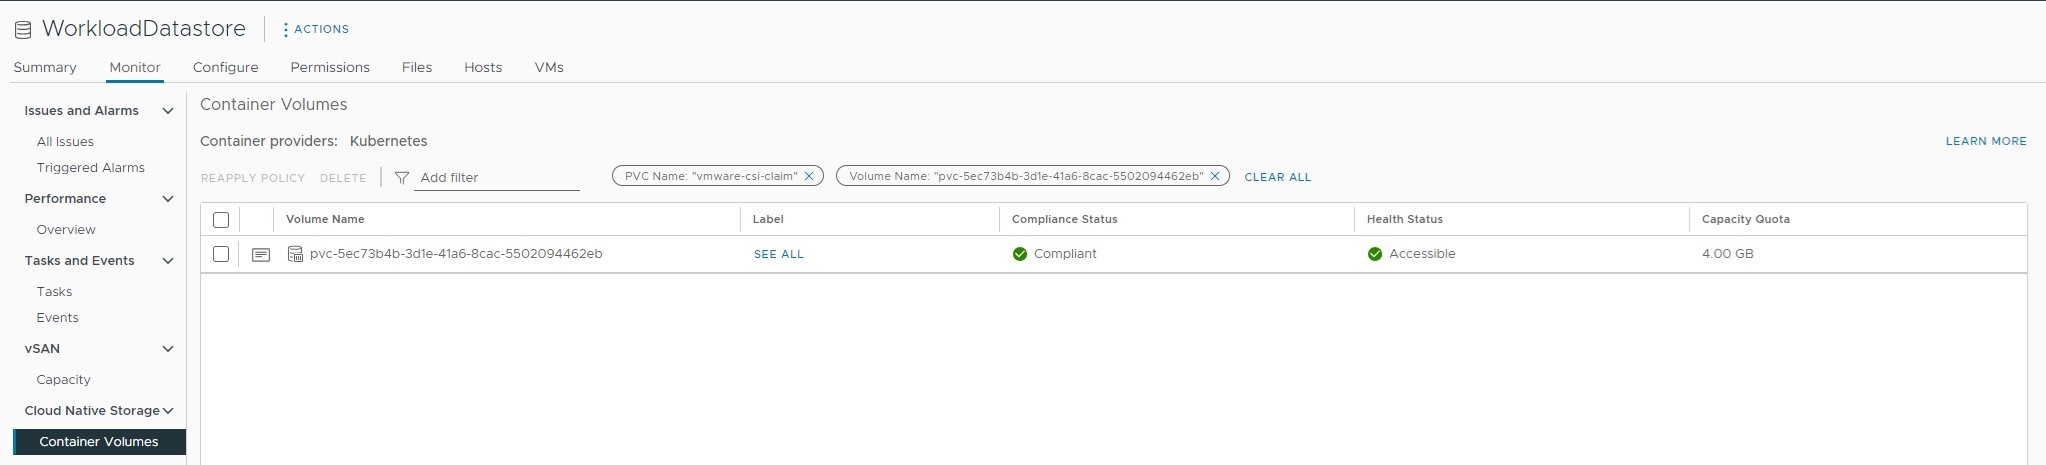
Figure 2: vCenter storage UI showing the test workload’s volume
Similar to how API resources PersistentVolume and PersistentVolumeClaim are used to provision volumes, VolumeSnapshotContent and VolumeSnapshot API resources are provided to create volume snapshots.
A VolumeSnapshotContent is a snapshot taken from a volume in the cluster and it is a resource in the cluster just like a PV is a cluster resource. A VolumeSnapshot is a request for a snapshot and it is similar to a PersistentVolumeClaim. Next, let’s check on the VolumeSnapshot, which is a point-in-time snapshot of our volume, which can be used for restoring the storage for the stateful workload
Finally, let’s validate the restore operation on the stateful workload by creating a workload that uses the created point-in-time snapshot using the following commands:
With that restored pod created we can now see that an additional volume has been created, both in our vCenter UI and on our cluster by running the following command again:
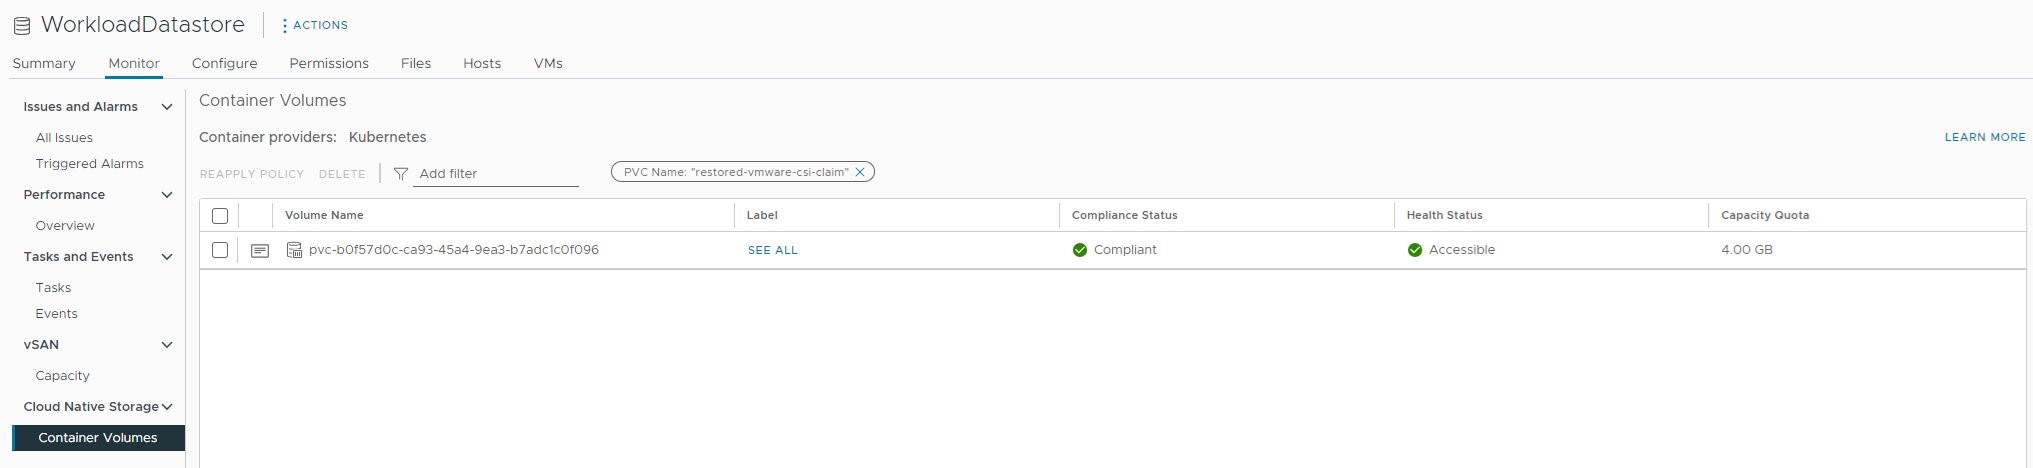
Figure 3: vCenter storage UI showing the snapshot restore test workload’s volume
Cleaning up
To avoid incurring future charges, clean up the EKS Anywhere cluster resources and AWS resources created during the lab:
Conclusion
In this post, we demonstrated the process of using GitOps to deploy a vSphere CSI driver on your EKS Anywhere cluster on your vSphere environment. Furthermore, we demonstrated the process of deploying a stateful workload to our EKS Anywhere cluster using vSphere CSI driver. Then, we demonstrated the underlying process of persistent volume claim and persistent volume creation with stateful workload, which dynamically created a storage on vCenter storage. Finally, we backed up the volume by creating a point-in-time snapshot of the volume and performed a restore operation of the stateful workload with the created point-in-time snapshot. Users looking to run stateful workloads on EKS Anywhere clusters on vSphere can seamlessly follow this approach to operate stateful workloads at scale.
To learn more about managing your EKS Anywhere environment, check the following resources: